
The Kirtle: Construction
The Kirtle: Construction
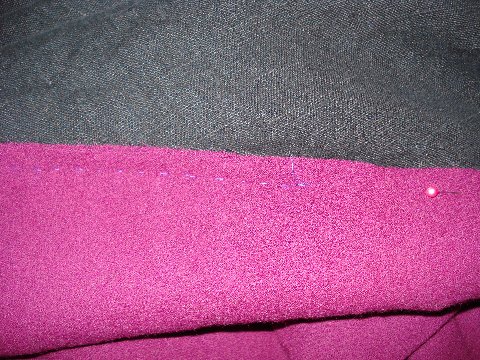
I decided to use the pattern for the kirtle in the Tudor Tailor as the basis for my pattern, although I am definitely not the same shape and size as the pattern model. I planned, and succeeding in making the kirtle entirely by hand, with only hand sewing used. The kirtle was constructed from a fine magenta wool suiting, black linen for the lining and a fairly lightweight cotton duck for the interlining.
Because of the size difference between myself and the model in the Tudor Tailor, I knew there was going to be a lot of fussing and fitting to make the kirtle bodice fit to my liking. The first thing I did, before worrying about my size, was to enlarge the bodice pattern in the book to actual size. I am making a side lacing kirtle, boned in the front, with a V shaped back. I am not sure that the lacing in the originals is to the side, although this seems logical. Certainly the back is V shaped, to judge from Holbein's sketch visible to the right.
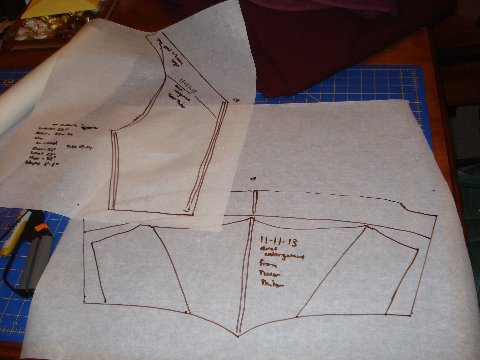
Patterns from the book scaled up to actual size.

Resizing the front bodice pattern to fit my body.
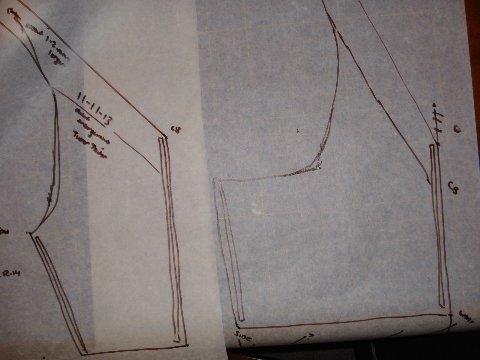
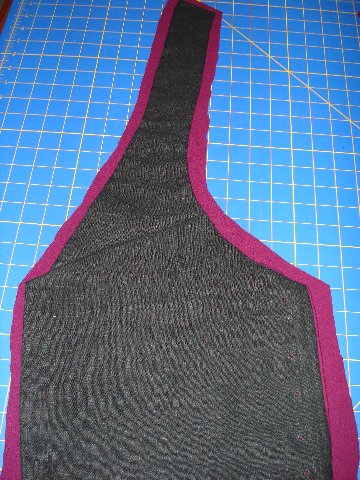
Resizing the back bodice pattern. The kirtle bodice only has three pieces; the front, and two back pieces.
The Bodice Toile
Using the life-size Tudor Tailor pattern as a base, I compared my measurements in various areas with those of the pattern and adjusted accordingly. I am fatter, shorter waisted (especially in the back), larger busted and shorter in height than the original pattern. Difficulties included not having a dress dummy, not having anyone to take measurements in back (my husband tries, but it's hard to explain exactly what I need at times), and so on. I solved this by using garb I knew fit well (a recently constructed corset) and taking measurements from that. And it worked to get a basic pattern that fit pretty well!
I worked up the first bodice toile without any boning and fitted it. My husband helped and was able to help me side fasten it and work out the back pattern around the shoulders, where I knew there'd be problems. My upper back is very muscular, curved and, of course, has some fat on it; this combo can make for an interesting fitting experience.
The basic changes to make the Tudor Tailor pattern fit my body:
- center bust to armpit: Mine was a bit bigger so I expanded the top line slightly
- center waist to side waist: Mine was much bigger, so I expanded that.
- center bust to center waist (front of kirtle): Mine was slightly longer, lengthened as needed.
- back center to back waist: Mine was much shorter
- back waist to side waist: enlarged as needed
- the straps: mine were going to be a bit shorter
- center back to armpit: adjusted accordingly
- The part I couldn't check was how to fit the back of the kirtle around my armscye, so to speak. I needed help with that. So I put on the toile and had my husband pin me in along the lacing lines at the side. Found out the toile was a bit long waisted in the back, and it didn't cover the area outside the armscye in the back like I wanted. My husband took a few measurements for me, marked them on the toile and it was back to the cutting board
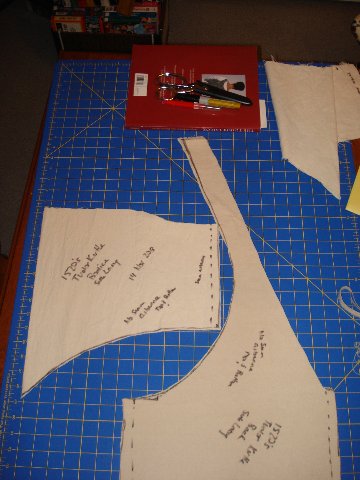
The pattern, resized to fit me

Cutting out the bodice toile (and eventual interlining) from the pattern
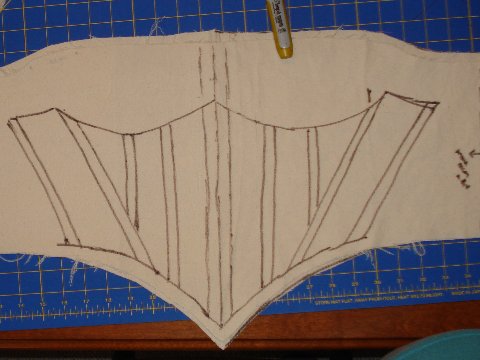
Working out the boning channels.
The Bodice
I cut out interlining for the bodice in fairly robust fabric (I'm using a light cotton canvas/duck, the same fabric that I used for the toile). I cut two layers, so as to make the boning channels.
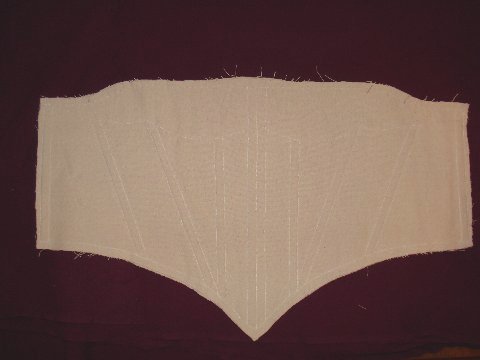
The front bodice interlining, boning channels finished
Front bodice with boning in, ready to cut out lining

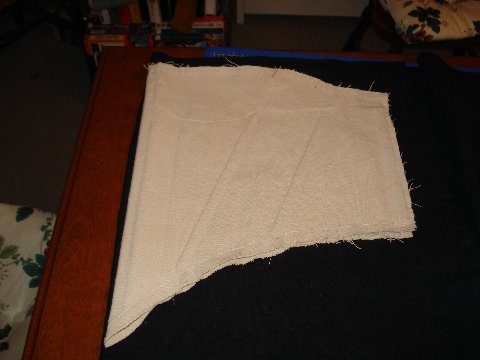
Back bodice interlining: showing boning channels
I hand sewed the boning channels, as I did the rest of the kirtle, because I love to hand sew. For the boning channels I used a basic backstitch. The boning pattern is taken from the Tudor Tailor and then adjusted. I didn't put as much boning in as they call for, seeing as how their article (Malcolm-Davies et al 2008) suggested that less boning might be needed. I had though to use buckram to bone the kirtle, but after reading a few reviews on the attempts of better seamstresses than I to use it, I've decided against it (see, for example, Lorraine: undated). I used modern 'whalebone', aka zip ties. This is new to me, as I've always used metal boning before. I love the modern whalebone! It is flexible but strong and holds shape well. I have put in about 1/2 the boning originally designed for the kirtle and it works just fine. Next time, I might harvest and dry some reeds from the farm!
Once I got the interlining done, with the channels and the boning in, I took another fitting. I found out that my left arm/shoulder and shoulder blade are bigger than my right. This makes sense, as I'm left handed. I took a dart in the right shoulder area of the back bodice to account for this. I should have taken another, smaller, dart across the left shoulder area to account for the curve of my back. I didn't as I was doing the fitting mostly myself and I was using my left arm and didn't notice the problem at that time. A friend later corrected it for me (see below).
I'm really worried about the gown stretching. I've had this happen with wool/linen gowns before. So I decided to make the bodice a bit smaller around the waist by taking in some of the side area (where it will lace). I had fitted the bodice to have 2 inch gaps at the sides. I redid them for 3 inches. And looking in to the future, I was right to worry. After lacing into the gown several times the gaps are GONE (see below for more on this).

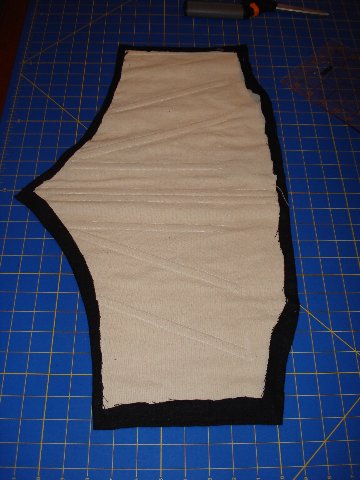
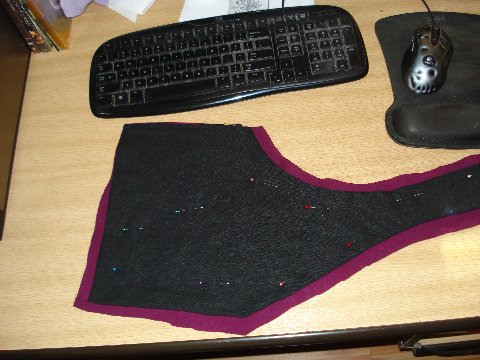
Bodice back with dart (right side). Eventually the left side needed a dart as well.
Bodice back, lined and ready for fashion fabric.
Bodice front, showing the lining quickly basted around the edges.
I used black linen for the lining. I cut out the pieces for the bodice, using the bodice interlining as a guide, that way the right side of the back was correct. I added 1/2 inch seam allowance all around, and then wrapped the linen around the bodice interlining, sewing it with a quick running stitch by hand to lock it in place (see pics above).
Once the lining was attached to the interlining, I used the pieces as a guide for cutting out the final pieces, in the top fabric. Once again I allowed a seam allowance. The top fabric is a lovely magenta wool crepe, and is awesome to work with.
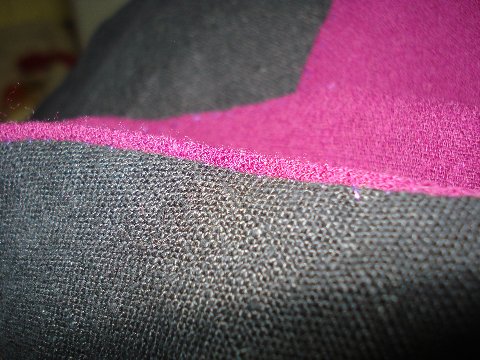
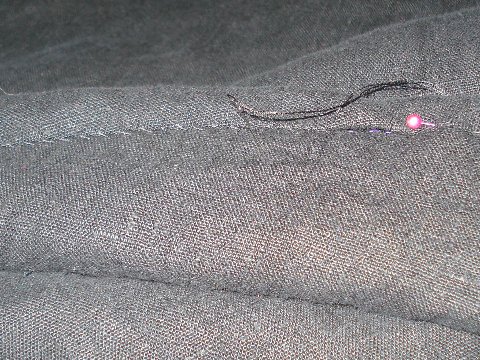
I laid the bodice pieces made from the lining and interlining on the fashion fabric (a magenta wool suiting) and smoothed everything out, then used pins (I could have used basting stitch and have used it in the past, but pins seemed quicker) to hold everything in place. The top fabric was folded down along the edges, and I ran a period stitch, called a prick stitch, along the edges. This nifty stitch holds the lining and top fabrics in place and creates a neat little line of running stitches on the top fabric, which are nearly invisible. I used a slightly different shade of purple/magenta for the thread as I wanted the top line to show a bit, being an embellisher after all!
The two back pieces were whip stitched together along the center back line.
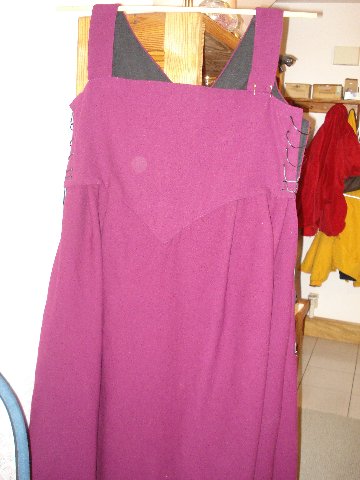
Lacing eyelets were made on each side of the bodice (front and back for 4 sets of eyelets) and the shoulder straps were whip stitched in place at the front neckline of the bodice. And, the bodice was done.
The kirtle bodice neckline will have a strip of black silk, shot with gold, with gold embroidery on it attached to wear with the black velvet gown. This is coming soon!
Cutting out the fashion fabric pieces using the interlining and lining as a guide.
Pinning the wool (fashion fabric) to keep it stable before prick stitching around the edges.
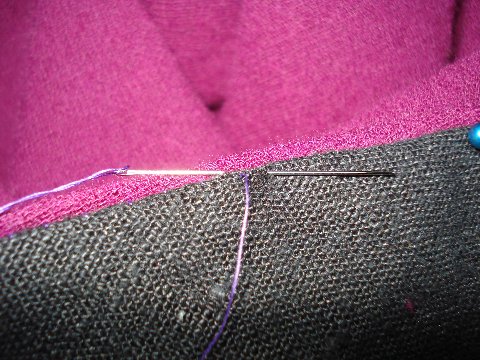
The prick stitch. The magenta wool is the 'top' of the garment, the black linen - the lining.
The prick stitch on the inside. The thread used here is purple and just faintly visible.

The outside after the prick stitch is done. A line of small running stitches is barely visible.
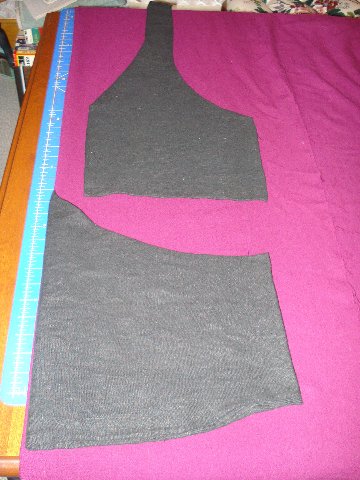
The Kirtle Skirt
The skirt for the kirtle, as shown in Tudor Tailor, is simple. It is cut out along the front waist to match the lines of the kirtle bodice. It is pleated a few times at the front sides, and pleated more across the back. It has a cone shape; wider at the bottom than the waist, with slanted side seams.
The challenge here was I didn't have enough black linen fabric to easily to the lining. So I turned to a method used in period, and pieced the lining together for the back panel.
I cut out the skirt pieces in the linen first, and then cut them out in the wool, using the linen pieces as the pattern for the wool.
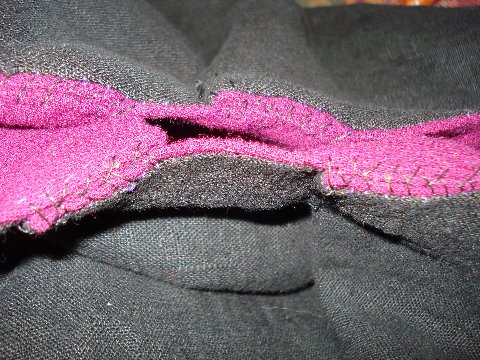
Once cut I pieced together the front and back pieces at the side seam. There are only two seams for the kirtle skirt; one on each side. I used the technique where the fashion fabric pieces and one lining piece are sewn together with a running stitch. The second lining piece is laid over the unlined fashion fabric, edges are matched up, and the edge of the second lining piece is turned under and whip stitched, or hem stitched, down. This covers the seam very neatly and quickly.
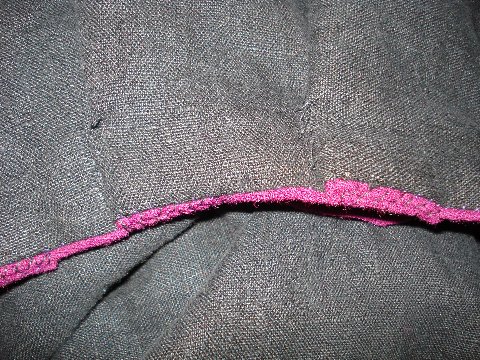
The skirt side seams were prick stitched were the seam opened at the waistline. The top of the skirt (the waist) was also finished by prick stitching (can you tell I like this stitch?). Finally the pleats were made, whip stitched with buttonhole thread into place and the skirt was sewn to the bodice.

How did she get in here?

Front edge of the skirt, shaped to fit the point of the bodice.
First part of the side seams; a running stitch holding two pieces of fashion fabric, one of lining.
Second part of the side seams; adding the final lining piece and whip stitching over the previous seam.

Skirt pleats - setting in place with pins.
Skirt pleats - whip stitched in place. Notice the prick stitched edge on the skirt.
Skirt pleats - I whip stitched a bit down the pleat to help set it in.
Wearing the Kirtle
I'm please to say that the kirtle fit pretty well from the start. I left a lot of room between the side lacing bones, because I was worried that I'd make the waist circumference too small. This was silly of me. The circumference is fine, and right now, it is a bit too large, assuming the fabric stretches like it usually does. Luckily I discovered this before I'd done the lacing eyelets. I shortened the waist circumference by taking a full three inches off each side (1.5 inches off each side piece). This, theorectically, made a gap of 3 inches on each side. Sure enough, with fabric stretch and tighter refitting, the gap is now about 1 inch or less on each side.
The kirtle seems a wee bit long waisted. This is partly an artifact of the weight of the skirts pulling down the bodice, and partly an intended effect on my part. I like the way it looks with the last 1/2 inch of bodice turning to flair slightly over the hips. However, this will not do for the velvet gown, so I will have to be careful when I design the gown.
On the final fitting, which I did with the help of an experienced seamstress friend, I discovered the left back area, right over the shoulder blade, was a bit too loose for my liking. I think this escaped my previous notice because I'm left handed, and was always looking over my right shoulder to examine the back in the mirror, while holding things closed with my left hand. No matter. I fixed this with a tuck/dart across the back, as detailed in the pictures below.
Other than that the kirtle fits wonderfully. It has exactly the sprayed on look across the bodice top I was after. It is comfortable, despite the boning in the bodice. I can move well in it, even doing strenuous things. The skirt flows well, the shoulder straps stay in place. It feels good. Now, on to the gown!
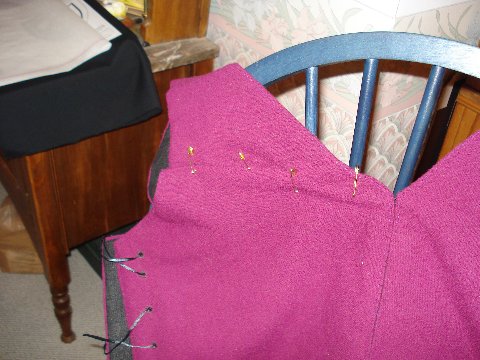
Tuck pinned across the back shoulder of the kirtle on the left side. This will have to be made permanent.

I wasn't going to redo the lacing eyelets. So I took off the fashion fabric, making sure it kept the pinned shape.

The lining and interlining with the eyelet strip intact.

The lining and interlining, tuck taken and resewn (eyelet strip still there!).
Inside, showing the tuck sewn into the lining and interlining. Using this as a pattern for the fashion fabric (wool).
The finished kirtle!
References
Lorraine, Sarah
undated 'Boning Descriptions' accessed 15 November 2013 on the internet at
http://www.modehistorique.com/research/boningdescriptions.pdf
Malcolm-Davies, Jane, Caroline Johnson and Ninya Mikhaila
2008 ''And her black satin gown must be new-bodied’: The Twenty-First-Century Body in Pursuit of the
Holbein Look' Costume 42:21-29
Mikhaila, Ninya and Jane Malcolm-Davies
2006 The Tudor Tailor BT Batsford London
Sketches and Portraits
If you click on them, you'll be taken to a much larger version, in most cases.


Images from Wikimedia Commons.

Image from the British Museum Collection